Showing posts with label card. Show all posts
Showing posts with label card. Show all posts
Monday, September 8, 2014
Etisalat Magic Sim Card Activation For Free browsing On Blackberry
Etisalat Free browsing as been virtually impossible until now, finally you can browse free on your blackberry using etisalat line. Please note this particular free browsing works only on blackberry phone, the etisalat free browsing for blackberry cannot be used on pc nor android devices.
Tutorial is basically for all blackberry users except VERIZON BLACKBERRY PHONE. After etisalat magic sim card activation you dont need to worry over blackberry subscription again.

Unlimited download and Internet browsing after activation.
Switch To EasyCLiq -
Read More..
Tutorial is basically for all blackberry users except VERIZON BLACKBERRY PHONE. After etisalat magic sim card activation you dont need to worry over blackberry subscription again.
Benefits of the latest Etisalat Magic Sim Card For Blackberry
You do not need to worry about monthly blackberry subscription on etisalat after follow this simply free blackberry subscription tweak.Unlimited download and Internet browsing after activation.
How to Activate Etisalat Magic Sim Card Free Browsing Tweak
Switch To EasyCLiq - Recharge With 100N Airtime
Note : timing really matters if you are not fast enough the tweak wont work
Dial *499*3*2#
You will receive a message your request has been receive and is being process
Cut it and dial *244*2#
When u dial *244*2# dey will also tell u dat ur request is being process
Cut it again and dial *244*3# it will tell u dat u are on BB voice plan
Remove your phone battery and Insert again
Note : timing really matters if you are not fast enough the tweak wont work
Dial *499*3*2#
Cut it and dial *244*2#
When u dial *244*2# dey will also tell u dat ur request is being process
Cut it again and dial *244*3# it will tell u dat u are on BB voice plan
Remove your phone battery and Insert again

Friday, August 29, 2014
How to Partition SD Card Android
How to Partition SD Card Android - The Android smartphone presence of an SD Card can be quite vital. Android smartphones internal memory limitations require us to add external memory to store a variety of data ranging from the essential to the data than just entertainment. It seems like the hard drive on a PC, memory grouping for specific files necessary to facilitate pretty organizing important data on Android memory. Unfortunately the Android smartphone to date can only support one external memory slot. As a solution, it can be done to partition SD Card Android.
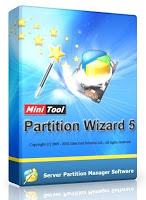
To Partition SD Card Android needed a software development partitions in this paper we choose "Mini Tool Partition Wizard". This is a windows software which can be downloaded for free at> http://www.partitionwizard.com/download.html.
Then install the software on a computer buddy.
How to Partition SD Card Android via PC
1. Remove the SD card of the Android smartphone, then connect to the PC using a Card Reader or if using a laptop live input it into the SD Card slot laptop.
2. Wait until the SD Card read. Furthermore, backup all the data on the SD Card (copy it to a folder on the external SD Card). The process will partition mengabitkan ter-format SD Card and causes all data will be lost.
3. Run the software Mini Tool Partition Wizard. Then right click on the SD Card select "Delete" make sure the SD Card is in a state of "unallocated"
4. Select "Create Partition". Adjust as needed partition capacity allocation pal. Suppose my friend has a capacity of 8 GB SD Card and want to partition into two sections each 6 GB and 2 GB. 6 GB as Logical (for storing data) and the remaining 2 GB Primary (for File System).
In the "Create As" fill "Primary"
In the "File System" content "FAT32"
In the "Partition Size" content "2000 MB"
Click "OK"
 The first partition for File System completed
5. Following that create a second partition for data. Select "Create Partition".
In the "Create As" content "Logical"
In the "File System" content "EXT2"
On the "Cluster Size" content "4kb"
In the "Partition Size" content "6000 MB"
Click "Apply" at the top left
6. Wait for the process several times and my friend has been partitioned SD Card.
Now you can capitalize on the SD Card partition as needed. Similarly, our review of How to Partition SD Card Android.
Then install the software on a computer buddy.
How to Partition SD Card Android via PC
1. Remove the SD card of the Android smartphone, then connect to the PC using a Card Reader or if using a laptop live input it into the SD Card slot laptop.
2. Wait until the SD Card read. Furthermore, backup all the data on the SD Card (copy it to a folder on the external SD Card). The process will partition mengabitkan ter-format SD Card and causes all data will be lost.
3. Run the software Mini Tool Partition Wizard. Then right click on the SD Card select "Delete" make sure the SD Card is in a state of "unallocated"
4. Select "Create Partition". Adjust as needed partition capacity allocation pal. Suppose my friend has a capacity of 8 GB SD Card and want to partition into two sections each 6 GB and 2 GB. 6 GB as Logical (for storing data) and the remaining 2 GB Primary (for File System).
In the "Create As" fill "Primary"
In the "File System" content "FAT32"
In the "Partition Size" content "2000 MB"
Click "OK"
The first partition for File System completed5. Following that create a second partition for data. Select "Create Partition".
In the "Create As" content "Logical"
In the "File System" content "EXT2"
On the "Cluster Size" content "4kb"
In the "Partition Size" content "6000 MB"
Click "Apply" at the top left
6. Wait for the process several times and my friend has been partitioned SD Card.
Now you can capitalize on the SD Card partition as needed. Similarly, our review of How to Partition SD Card Android.
Subscribe to:
Posts (Atom)
